Fall is such a beautiful time of year! The leaves changing colors. The crisp, frosted mornings. The roar of football crowds. Pumpkin lattes, cozy scarves and cute boots – seriously, it’s a season we look forward to year after year. And, if your home is anything like ours, one of our most beloved fall traditions is pumpkin carving! Which is why we thought we’d share some pumpkin carving tips to make the process as fun and as memorable as it should be. So, grab your pumpkin and let’s go!
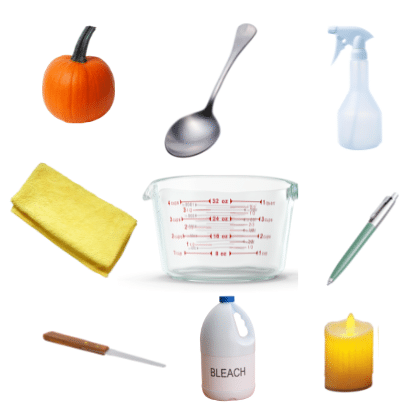
You’ll need:
Pumpkin Damp cloth Thin serrated knife
Large spoon/scooper Quart of water Tablespoon of bleach
Spray bottle Ball point pen Flameless/Battery operated tea light candle
Optional: Stencils & a pumpkin carving kit – you don’t necessarily need to purchase a pumpkin carving kit from the store, but you can if you want to protect your everyday kitchen utensils and tools.
Step One: Clean the pumpkin
The first thing you want to do is, make sure your pumpkin is clean. With a damp cloth, wipe all the dirt off the surface of the pumpkin and dry it completely. Then, you’ll want to cut a fist-sized opening in the pumpkin. Some people prefer to cut the top off at the stem, which does make it easier to reach in and get the guts out or light a candle. Others prefer to cut the bottom off so the finished look is more aesthetically pleasing. It’s totally up to you which way to do it.

Step Two: Prep the pumpkin
Once you’ve cut a fist-sized opening in the top or bottom of your pumpkin, you need to begin removing all those squishy guts from the inside. Oh, don’t squirm! You know what I’m talking about – all the slimy, stringy fibers and seeds. Call me crazy, but I dig right in with my hand and pull out as much as I can before switching to a spoon. It’s oddly satisfying, right? Should you choose to begin with a spoon, like I’m told reasonable people do, then you may want to invest in an oversized spoon that has serrated edges. They can typically be found in pumpkin carving kits that are sold at most grocery and craft stores. It will come in handy when you scrape all the strings off the inside walls of the pumpkin.

Bonus tips:
Don’t toss the seeds in the trash! Let them dry out a bit, then roast them in the oven for a tasty treat. And, if you cover your workspace with newspaper than clean-up is a breeze! Just roll up the mess and toss it!
Ok, we’re just about ready to begin carving, but before we do, there’s one last step to making sure it’s cleaned properly. Now that we have the strings and seeds removed from the inside, we need to prepare a mixture of water and bleach to wash the inside of the pumpkin. Add one tablespoon of bleach to one quart of water and spray the inside of the pumpkin. Allow it to dry for 20 minutes before you begin carving. The typical untreated-carved pumpkin will begin to show signs of decay in as little as one week. The bleach water serves as a preservative and can prolong the life of your carved pumpkin up to three weeks! Additionally, the smell of the bleach is detectable by small critters that may want to snack on your artwork. It will keep them away from your masterpiece!
**Note: Do NOT eat any pumpkin that has been treated with bleach water!
Guess what, y’all! It’s time to get carving!

Step Three: Carve the pumpkin
Unless you’re planning to carve a simple jack-o’-lantern face or you have the drawing skills of Da Vinci, then you may want to invest in pumpkin carving stencils for this part.
Use the ball point pen to draw or trace your chosen image onto the pumpkin. Using a pen, opposed to a pencil, makes the lines easier to see when you’re cutting into the pumpkin, and don’t worry! – you can easily “erase” any mistake by using a q-tip that’s been dipped in rubbing alcohol.
Ok, now that you’ve got your super-awesome design drawn on the pumpkin you can use the thin serrated knife to carefully cut along the lines you’ve drawn. Once you’ve fully carved your design the way you want it, you’ll want to grab that spray bottle of bleach water and give any newly-exposed fleshy areas a spray. After all, we don’t want your happy jack-o’-lantern’s smile to begin shriveling into a frown.
The final step to creating your perfectly carved pumpkin is to place a flameless, battery-operated tea light candle inside your pumpkin. You can purchase a multi-pack of these candles at any craft supply store. We like them because they don’t put off heat or produce soot, which can cause your pumpkin to go bad more quickly.
So, there you have it! You, my friend, just carved a fabulous pumpkin! Happy fall, y’all!
